Concrete Ceiling Repair Step-by-Step – Rusted Rebar & Water Damage Fix
Plaster work
0:00 / 0:00
Concrete Ceiling Repair Step-by-Step – Rusted Rebar & Water Damage Fix
15 229 просмотров · 1 год назад
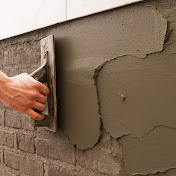
Plaster work
143 подписчика
15 229 просмотров · 1 год назад
In this video, we demonstrate how to repair a concrete ceiling that was severely damaged by water, leading to rusted rebar and structural deterioration.
We walk you through the full repair process step by step — from removing the damaged concrete and treating the corroded reinforcement steel, to installing anchor bolts and applying structural repair mortar.
The final steps include plastering and surface preparation to restore a clean, solid, and long-lasting result.
► Chapters:
00:00 – Before & After
Visual comparison of the damaged ceiling and the final repaired result.
00:31 – Remove Damaged Concrete
Breaking and removing the deteriorated concrete to expose corroded rebar.
00:41 – Remove Rust from Rebar
Using a wire brush wheel to clean the rust from the exposed reinforcement steel.
01:00 – Install Anchor Bolts
Plastic plugs and anchor bolts are prepared and drilled into the surface to secure new reinforcement or fixtures.
01:27 – Apply Repair Mortar
Filling gaps and damaged areas with structural repair mortar.
02:07 – Apply Repair Mortar on Panels
Covering the form panels with mortar to ensure bonding and structural integrity.
02:55 – Remove Panels
Dismantling the panels after the mortar has properly set.
03:17 – Apply Plaster
Applying the pre-final plaster layer to level the surface in preparation for the finishing coat.
03:51 – Final Finish
the ceiling after completing all structural repair steps .
🔖 Hashtags:
#concrete #repair #ceiling #plastering #structuralrepair
