Bronco II Carburetor Rebuild Part 1 | Full Disassembly & Cleaning
1984 Ford Bronco II
0:00 / 0:00
Bronco II Carburetor Rebuild Part 1 | Full Disassembly & Cleaning
220 просмотров · 2 недели назад
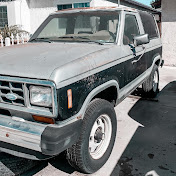
1984 Ford Bronco II
16 подписчиков
220 просмотров · 2 недели назад
Carburetor Rebuild Kit:
https://www.ebay.com/itm/173024097661...
Choke Pull-off:
https://www.ebay.com/itm/285024773325...
The 1984 Ford Bronco II restoration continues with a detailed carburetor disassembly and cleaning.
In the last video, I removed the carburetor from the Bronco because the engine was running extremely rich and would not stay idling unless I kept giving it gas.
This carburetor was actually rebuilt about three years ago, and after that rebuild the Bronco started and idled well. Unfortunately, the project stopped shortly afterward and the truck ended up sitting for roughly three years with fuel still having run through the carburetor.
Now that I have the Bronco back, I’m taking the carburetor completely apart again to see what happened inside.
And surprisingly, most of it still looks really good.
The gaskets still look almost new, the inside of the carburetor is relatively clean, and I’m not seeing the kind of major deterioration I expected.
The problem appears to be the old fuel residue and gunk.
Several small components, jets, valves, and moving parts are sticky or partially seized after sitting for years. So rather than replacing the entire carburetor, I decided to completely disassemble it, clean everything, and rebuild it again.
In this episode I go piece by piece through the carburetor, removing the top assembly, fuel filter, accelerator pump components, choke assembly, adjustment screws, jets, linkages, springs, and other small parts.
I’m definitely not a professional carburetor rebuilder. I’m learning as I go, watching other restorers, referencing what I learned during my previous rebuild, and documenting the process so we can figure it out together.
A few things I found during the teardown:
• Most of the gaskets still looked nearly new
• The internal passages looked surprisingly clean
• Several components were sticky from old fuel residue
• A small pin and bearing were partially stuck
• Some jets did not want to come out without excessive force
• The accelerator pump components still appeared to be in good condition
• Both adjustment screws were set at approximately 2¼ turns
Rather than forcing the stubborn parts and risking damage, I decided to let the carburetor body and components soak overnight in Chem-Dip carburetor cleaner.
Hopefully the soak loosens the remaining varnish and fuel deposits so I can clean everything thoroughly before installing the new rebuild kit.
One of the big decisions with this project was whether to spend roughly $300–$350 on a replacement carburetor or rebuild this one again.
Since I’ve already rebuilt it successfully once, I decided to give it another shot.
If you have experience rebuilding Ford carburetors, Motorcraft carburetors, Bronco II carburetors, or older carbureted engines, I’d really appreciate your input.
If you notice something I’m doing incorrectly, have a better technique, or know something I should check before reassembly, leave a comment so we can share the information with everyone following the project.
This series is about learning as much as it is about restoring the Bronco.
Next video: cleaning the parts, installing the new rebuild components, and putting the carburetor back together.
Then we’ll reinstall it on the Bronco and find out whether this finally solves the rich-running and idle problems.
Follow along with the complete restoration of my family’s 1984 Ford Bronco II, the vehicle I grew up with and drove as my first car in high school.
#FordBroncoII #BroncoII #CarburetorRebuild #BroncoRestoration #MotorcraftCarburetor #ClassicFord #ProjectCar #1984FordBroncoII #Bronco2 #DIYMechanic
