Autodesk Inventor Mold Design | Mold Assembly Part 1 (Egg Yolk Separator)
Khairul Irfan
0:00 / 0:00
Autodesk Inventor Mold Design | Mold Assembly Part 1 (Egg Yolk Separator)
10 просмотров · 2 дн. назад
Khairul Irfan
50 подписчиков
10 просмотров · 2 дн. назад
Welcome to Episode 19 of my CAD/CAM/CAE engineering portfolio series!
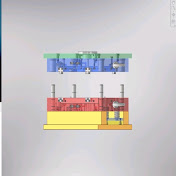
In this episode, I continue advancing the Egg Yolk Separator injection mold design in Autodesk Inventor by selecting and assembling the complete Mold Base and integrating key mold components. This video series documents my practical engineering workflow and technical progression in mold design and tooling design.
What’s covered in this video:
✅ Selecting and configuring the Mold Base
✅ Inserting and aligning Mold Components:
• Cooling Component
• Locating Ring & Sprue Bushing
• Ejector Pins for part ejection system
---
📌 CREDITS & ACKNOWLEDGMENTS:
The reference tutorial concept and 3D plastic part workflow used in this demonstration are inspired by @AlwisDesign. While the original tutorial was executed in SOLIDWORKS, this video demonstrates my implementation using Autodesk Inventor Mold Design features.
👉 Check out Alwis Design for more CAD tutorials:
/ @alwisdesign
---
🛠️ Software Used: Autodesk Inventor
🎯 Focus Area: Mold Design, Mold Base Selection, Tooling Components & Ejection System
📁 Project: Egg Yolk Separator Mold Tooling (Video #19)
Thank you for following my engineering portfolio journey! Suggestions, feedback, or technical discussions are always welcome in the comments below.
#AutodeskInventor #MoldDesign #MoldBase #EjectorPin #SprueBush #LocatingRing #SideLock #CADPortfolio #PlasticInjectionMoulding #MechanicalEngineering #ToolingDesign #EngineeringPortfolio
