Fantastic Model FM-05 Rambo Transformation Sequence
peolesdru
0:00 / 0:00
Fantastic Model FM-05 Rambo Transformation Sequence
3 195 просмотров · 13 дней назад
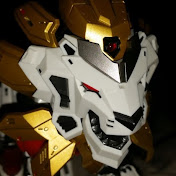
peolesdru
17 тыс. подписчиков
3 195 просмотров · 13 дней назад
Purchased from ShowZStore: https://showzstore.com/
Listing page: https://showzstore.com/fantastic-mode...
Figure Note:
Stop-Motion Transformation of Fantastic Model FM-05 Rambo. Pretty. Good proportions. As far as Fans Toys figures go, he isn’t the worst I’ve seen. I thought I would have to use more armatures, but he held hi positions fairly well.
Some transformation notes: The flanged tabs that plug into his forearms are VERY tight. I gave up on trying to plug them in and reduced the flanges a teeny tiny amount with a dremel. You wouldn’t want to overdo it because those flanges hold the car together, after all. I show the flanges deploying at a clearer point, but you will almost certainly have to fidget them out right before you plug them in.
You have to get the false hood in perfectly flat for car mode so the real hood will fit over it properly. It actually has locating tabs that fit in slots in the diecast skeleton bit. The head ends up wonkier than you would assume it should. I find I can pop the rear of the front fenders into the back of the hood (near the windshield) without having to support them from underneath with a spudger - I just kind of flatten it all and and squeeze from both sides. THEN I seat the windshield.
Putting the thighs away: That whole armature fits easily as long as you bend the knee at the little joint closest to the plate. Putting the chest together is mostly constrained by how you arrange the silver diecast pins in relation to the front of the chest. They can be both too far and too close so it takes some fiddling. Locking in the tabs on the sides (behind and below his armpits) can help with proper alignment on top ultimately.
Getting the shoulders in for car mode means you compress them towards the front of the car until those seating tabs near the wheels home on top of the shoulders.
No waist rotation for the turnaround because FT in their customary overdoing things gave him a ratcheted waist and I didn’t want to have to fight it into mid-ratchet positions when I have to do 1/144th of a rotation for each photo.
Support Note:
Like what you see? Send me a tip! https://paypal.me/peolesdru
You can also give me some points when you shop at ShowZStore by putting in “Support Reviewer” code “peolesdru”.
Car to Robot: 0:09
Robot to Car: 1:24
Speed run to Robot: 2:39
Speed run to Car: 3:01
2x Run: 3:24
End credits: 3:47
Production Note: 693 Photos. 1.75 hour shoot.
Viewing Note:
If you want to follow along, I recommend skipping to the speed run and using your , and . keyboard keys to advance by single frames. Every step of the transformation is documented in the frames of the video, in what I consider to be the best sequence. With minimal rubbing and minimal parts-parking.
Music: The music is by Ethan Meixsell - www.ethanmeixsell.com
Songs: “Collision” and “Run”
