Made a Light Up Photo Booth using Claude
DD
0:00 / 0:00
Made a Light Up Photo Booth using Claude
150 просмотров · 7 дней назад
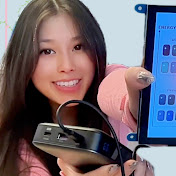
DD
54 подписчика
150 просмотров · 7 дней назад
I turned my DIY receipt photobooth into a glowing, 3D-printed purse—because apparently I need my accessories to print photos. 💜📸
In part two of this build, we’re making her portable. Think translucent purple, floral details, a chain strap, and a tiny photo-printing setup inside. She even matches my cyberdeck.
I walk through how I used Claude to help design the bag, organize the hardware measurements, and work through different prototypes. We’ll go from testing little mounts for the camera and printer to fitting the Raspberry Pi, screen, battery, and a very chaotic collection of wires into one enclosure.
This is the actual making process: the test prints, the parts that didn’t fit, the measurements I missed, and what I’d do differently next time. Not just the cute finished product. 🛠️
For the girls who have ideas for things they wish existed but aren’t sure where to start—let’s figure it out together. Subscribe for more cute tech, creative builds, and learning as we go. ✨
📸 *Watch part one — making the photobooth work + adding LEDs:*
• Receipt Photo Booth Bag 4 Dummies pt. 1
🛠️ *Parts list, code, assembly instructions + 3D print files:*
https://github.com/darknet-doll/recei...
00:00 A photobooth, but make it a purse
00:43 Planning the build with Claude
01:55 Design goals: compact, functional, accessible
2:30 Constraint #1: everything on the same face
2:39 Receipt printer mount
3:43 Camera & display monitor mount
5:33 Bag orientation: finding the right layout
6:17 Raspberry Pi test mount
7:06 Display screen spacer mount
7:35 Cylinders & spacer tests
7:52 Test fitting the spacer and display
8:26 Random AI slop (holes that weren't useful)
8:28 Buffer to align monitor, camera & Pi
9:38 Spacer fit check
10:00 Receipt printer hinge fail
10:39 Final front-face assembly
11:29 Constraint #3: wires & enclosure
12:04 Lid fit test
12:17 Corner fit & printing the housing
17:04 Bag strap & chain
18:08 Lessons learned
Github details all the parts I used, how to assemble, and 3D print files!
https://github.com/darknet-doll/recei...
#DIY #3DPrinting #CreativeTech #raspberrypi #diyelectronics
