Crochet Top Tutorial | Crochet Top with Sleeves | Crochet Ivory Top | Crochet by Marnel
Crochet by Marnel
0:00 / 0:00
Crochet Top Tutorial | Crochet Top with Sleeves | Crochet Ivory Top | Crochet by Marnel
844 просмотра · 6 мес. назад
Crochet by Marnel
1,32 тыс. подписчиков
844 просмотра · 6 мес. назад
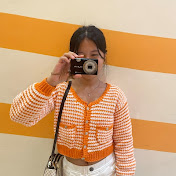
Make this crochet top (Ivory) with sleeves!Perfect for our OOTD and it’s very cute trendy top. Hope you will love this pattern 🫶🤍
If you find some part confusing (I admit that crocheting with sleeves is tricky) don’t hesitate to ask me in the comment section. 😊
Link of the crochet top tutorial
• Crochet Top Tutorial | Crochet Peplum Top ...
🎀 You only need
100 grams of cotton yarn or your preferred yarn (for the sleeves part only [size xs-s], add more for bigger size)
2 mm, 3 mm and 3.5 mm hook
Darning needle
Tape Measure
Stitch Markers
⏰ Timestamps w/ guides
01:00 Identify first the center or the top (you can use the button part as the reference for the center) then mark both the front and back using only one stitch marker.
01:30 Count 8 rows from the center stitch marker, the mark the 8th row (make sure you mark in the chain 2 space) if you want your top less showy in the chest part you can just move in the 6th or 4th row. Mark also the chain 2 space at the back which is aligned in the front stitch marker.
Do the same thing on the other side.
02:59 We’ll start making the left sleeve in the video, but once worn it will be our right sleeve.
3 mm hook
Insert hook in the front stitch marker chain 80 (to make it less showy in the chest part, make less chains or add more if you want the opposite [divisible by 4]). After, we will minus 2 from the chains that we made (78 chains).
04:30 Slip stitch in the stitch marker at the back. Slip stitch again in the next space/stitch. Ensure that you slip stitch it to the left, which is the underarm section.
05:00 Row 1: Make SC in every chain (78 SC). Slip stitch 3x in the next 3 spaces.
07:24 Row 2: Turn, DC 2x in the first stitch. Chain 2, SC in the next stitch. Repeat (Skip 2, DC 2x in the 3rd stitch, chain 2, SC in the next) until the end of the row. Should end this row with SC. To close, slip stitch 3x in the next 3 spaces.
10:32 Row 3: Turn, in every chain 2 space make (DC 2x, chain 2, SC) until the end of the row. To close, skip 2 spaces, slip stitch in the 3rd, 4th and 5th space.
12:07 Row 4: Turn, in every chain 2 space make (DC 2x, chain 2, SC) until the end of the row. To close, skip 2 spaces, slip stitch in the 3rd, 4th and 5th space.
13:30 For following rows repeat row 4, until there’s no space left in the under arm part. Which I reached until row 9.
15:55 In closing the last row, ensure to slip stitch once only. (skip 2 spaces, slip stitch in the 3rd space)
If you made the foundation chain in the different row or curve section to make your top less showy, you will have more rows than mine.
16:40 Slip stitch in the first DC of row 9 or the recent row that you’re working.
16:49 Row 10: Chain 2, turn, in every chain 2 space make (DC 2x, chain 2, SC) until the end of the row. To close, slip stitch in the first DC.
18:17 Row 11-20 or until the desired length of the sleeve. Repeat this pattern, Chain 2, turn, in every chain 2 space (DC 2x, chain 2, SC) until the end of the row. To close, slip stitch in the first DC.
Just make sure you will end with an even number of rows.
Switch to 2 mm hook
20:20 Row 21: Chain 1, turn, make a SC decrease in the first SC and chain 2 space. SC decrease again in the 2 DC. Repeat until the end (SC dec in the SC and chain 2 space, SC dec in the 2 DC) until the end of the row. To close, slip stitch in the first SC.
Switch to 3.5 mm hook
22:23 Row 22: Chain 2, turn, in the first stitch, make DC 2x, chain 2, DC 2x. Continue until the end of the row (skip 2 stitches, in the 3rd stitch make DC 2x, chain 2, DC 2x)
In the video above I don’t have the right amount of stitches and that’s okay (doesn’t ruin the pattern) so in the last part I’ll just skip 1 and make the last (DC 2x, chain 2, DC 2x) in the last stitch. To close, slip stitch in the first DC
24:36 Row 23: Chain 2, turn, in every chain 2 space (DC 2x, chain 2, DC2x). To close, slip stitch in the first DC.
Chain 1 and cut the yarn.
26:17 For the other sleeve, which is the right side, but once worn will be on our left sleeve. We will start our chain from the back of the top (this is to make the first row which is the SC row facing on the right side of the top)
Then, just repeat the pattern.
Double check that as you make a slip stitch in the first row you’re doing it to the underarm part.
36:04 To support the sleeves on the back, make 200-250 chains
Done ❤️❤️❤️
🫶 💗Please hit the LIKE and SUBSCRIBE button for more crochet content. If you have any questions and suggestions feel free to comment 🥰
THANK YOU 🙏
#crochet #handmade #diy #crochetdesign #crochetcommunity #crocheting #youtube
