Easy Nail Art, Yellow And Green Stones
Homemade Nails
0:00 / 0:00
Easy Nail Art, Yellow And Green Stones
137 просмотров · 6 дн. назад
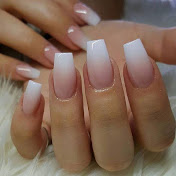
Homemade Nails
1,44 тыс. подписчиков
137 просмотров · 6 дн. назад
For sponsorship, collabs, promotions and others, contact me at: yvonnesharonl@gmail.com
#trending
#nails
Best Way to Apply Acrylic Nails at Home
Glue nail tips to each of your nails and trim and file them to the desired length and shape.
Pour liquid acrylic into a dish and pour acrylic powder into a separate dish. Load a brush with liquid acrylic before dipping into the powder.
Apply the mixture to your nails, flattening the acrylic and brushing it towards the tip. Let it dry for 10 minutes before polishing.
I often see people asking for a list of stuff to buy, to do nails. What items you need to do nails will depend greatly on what your goals are. So I decided to break it down into sections.
In this article you will find 5 lists
Nail prep
Gel polish only
Nail art
Gel extensions
Acrylic extensions
Each list serves its own purpose, but the first one, the most important one is the Nail Prep list. You will use this no matter what you are doing to your nails be it a manicure, gel polish, gel or acrylic extensions.
Nail scrubbing brush
Sanitiser
Cuticle softener
Cuticle pusher
Manicure Scissors
Cuticle nippers
100/180 grit files
Buffing blocks
Lint free wipes
Kitchen Roll/ Paper Towel
Alcohol with or without dispenser
Acetone with or without dispenser
Barbecide (or a sanitiser of your choice)
Cuticle oil
Dusting brush
UV/LED lamp
Primer (brand optional)
Base coat
Colored gel Polish
Shiny Topcoat (Regular or No wipe)
Matte Topcoat
Foil or removal clips
To achieve a professional-looking manicure at home, start by prepping your nails, then apply a base coat, color, and top coat. Finally, clean up any smudges for a polished finish.
Here's a more detailed breakdown:
1. Prep Your Nails:
Clip and File: Start by clipping your nails to your desired length, then file them to shape. Make sure your nails are completely dry before filing to avoid splitting,
Soak and Hydrate: Soak your nails in warm water to soften the cuticles. Apply a cuticle cream or oil to further soften them.
Push Back Cuticles: Gently push back your softened cuticles with a cuticle pusher.
2. Apply Nail Polish:
Base Coat: Apply a thin, even layer of base coat to protect your nails and help the polish adhere better.
Color Coats: Apply two thin coats of your chosen nail polish color, allowing each coat to dry slightly before applying the next.
Top Coat: Finish with a top coat to seal in the color and add shine.
3. Finishing Touches:
Clean Up: Use a small brush dipped in nail polish remover to clean up any smudges or mistakes around the edges of your nails.
Moisturize: Apply hand cream or cuticle oil to hydrate your hands and nails.
Optional Steps:
Buffing:
If desired, you can buff your nails to create a smooth surface before applying the base coat.
Nail Art:
For more advanced manicures, you can experiment with nail art techniques like dotting, striping, or using stencils.
Get a Perfect At-Home Manicure
Before
It has often been suggested to Melanie Chambers, a photo editor here at O, that she consider a gig on the other side of the camera—as a hand model. The compliments inspire her to polish her nails, religiously, once a week—but the results aren't usually fit for a close-up. So manicurist Roseann Singleton walked Melanie through her fine-tuned technique. First: Swap her go-to pinks for a deep purple; it's more striking against her pale skin.
1. File Your Nails
Make sure they are completely dry (filing wet nails can cause splitting). Rounded nails (mirroring the shape of your cuticle) that extend just over the edge of the fingertip always look elegant.
2. Soak Your Nails
Apply a rich hand cream. Then, soak your nails in warm, soapy water for five minutes to soften the cuticles. (One hand at a time if you want to flip through a magazine or play with your iPad.)
3. Push Back Your Cuticles
Push back your cuticles with a wet nail stone. If you have a hangnail, trim it; otherwise, don't clip cuticles (they protect nails from infection).
4. Apply a Basecoat
It helps the color go on smoothly and last longer. Try OPI Natural Nail Base Coat. Or, if your nails have ridges, Essie Ridge Filling Base Coat.
5. Brush On Two Coats Of Color
6. Apply a Top Coat
Singleton likes CND Air Dry, which helps cut drying time. Don't forget to swipe the top coat across the top of each nail as well, as you did with the color.
7. Clean Up Any Smudges
Clean up any color outside the edges of your nails with an orange stick wrapped in a thin layer of cotton and dipped in polish remover.
After
Tip: Not ambidextrous? Join the club. To minimize slipups, paint your dominant hand first (it's even trickier to use your nondominant hand when the nails are wet with polish) and always move from your pinkie to your thumb (which tends to rotate inward as you go and could get smudged)
Brush on two thin coats of color, waiting a couple of minutes after each hand. Use three strokes on each nail—on either side of the nail, then a swipe of color across the tip to prevent chips.
