GORGAR restoration #10 with playfield swap! ( Dr. Dave's Pinball Restorations)
Dr. Dave's Pinball Restorations
0:00 / 0:00
GORGAR restoration #10 with playfield swap! ( Dr. Dave's Pinball Restorations)
91 просмотр · 2 недели назад
Dr. Dave's Pinball Restorations
111 подписчиков
91 просмотр · 2 недели назад
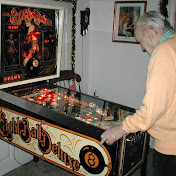
The Gorgar you see before you represents 4 months worth of work spanning over 60 hrs of labor. The client bought this game off of ebay as fully gone through / shopped out game but alas like so many pinball machine deals on Ebay, it wasn’t the case.
It did come with a new a backglass, standard rubber and a playfield protector to help even out the cupped insert laden playfield. But it never laid down properly as it was poorly installed and they didn’t clean the playfield first, nor touch it up like it should have been prior to the protector install.
That’s when the owner of this Gorgar contacted us to get it to the look and play like new level via our signature In Shop Full Spa & Resort Treatment.
We removed the playfield protector and cleaned the playfield hoping to save it but the insert cupping was so bad that it made more sense just to buy a new playfield and do a playfield swap.
We did a Topside playfield teardown & disassembly, remove everything from the top. Separated plastics from the metal to be buffed. Threw out old yellowed red posts. Removed pop bumpers and flipper bats, spinner etc.
Next we did underside playfield rebuilds and upgrades: Rebuilt the pop bumper mechs, upgraded the two 3 bank drop target mechs from the original unreliable horseshoe contacts to modern fast acting NPM Magnetic field effect style by Troxel. We upgraded the original old school floppy flipper mechs to 1990’s style Williams WPC style. For the pop bumpers and kickers, rebuilt the underside workings and added new capacitors to the switches for the pop bumpers and kickers.
We Repaired and replaced light sockets and cleaned and adjusted all switches and then threw out all the cheap bluesish white leds as we have better ones to install in the new playfield. The next step was to prep the new playfield: We took a drill with a large bit in reverse and hit every top side hole so that the clearcoat would be safe from getting pulled up when installing all the mounting screws from the old playfield. Pop bumper mylar protectors were then added.
BACKBOX electronics:
Installed a System Alpha MPU and driver board as well as a Weebly sound board to replace all the failed originals that were in there. The player 4 display wasn’t working so we replaced that as well. We had to repair the connectors on the 2 bridge rectifiers as well as add fuses to them to protect the transformer. We rebuilt the power supply including all new fuse clips as these are a known failure point on these Classic Williams games.
Back to the playfield:
We placed the 2 playfields face side down next to eachother and unscrewed and unstapled everything from the bottom side of the old playfield and then slid it over to the new playfield, then screwed down all underside components.
Topside installation:
We buffed all playfield topside metal guides and installed them as well as
new red posts, new pop bumper assemblies and a new CPR plastic and a new spinner. The 3 pop bumper caps that were on the game were pretty sunken in and yellowed from the heat of the bulbs so we used much better whiter ones from a donor game. We would have replaced with new but they are not available. As for the spinner and the drop targets, We installed new stickers on each.
The cabinet had dirty blue flipper buttons installed so we threw those out and installed new factory correct white ones. At this time we also installed the chrome glass rear receiver we buffed to a mirror shine as well as 4 new legs and hardware.
The cabinet rails and coin door were scuffed and dented so we replaced them both with new cabinet rails and a new coin door skin. We buffed all the coin door parts, repaired the coin mechanisms inside and then assembled the new coin door and added new colored bezels for each coin slot.
Back to the playfield:
We Installed COMET LED color matched feature lights and MITCHELL Lighting general illumination LEDS. While over 2X the cost of a comet, The Mitchells approximate the look of an incandescent bulb the best while adding the brightness of an LED. They are so worth it!
We Installed Perfect Play white silicone rubber and the new plastic set as well as a new shooter rod, shooter rod housing, sleeve, inner and outer springs and new yellow flipper bats. We custom aligned the flipper feed guides for a smooth transistion to the flippers by drilling new alignment holes as the CPR ones were way off and were causing the dreaded flipper hop.
The cabinet and head exteriors had seen better days so we repaired and deep cleaned both and then touched them up.
And finally to top this all off, we installed optically clear VOODOO playfield glass and of course a new super shiny pinball.
We have another GORGAR in stock that will come out as nice as this one! So if you are looking for a super sweet look and play like new GORGAR, please visit our website: www.pinballdoctor.com or email us here: dave@pinballdoctor.com
Also check out our podcast: The Classic Pinball Podcast
