How to use photo transfer gel
Art by Anna Karolina
0:00 / 0:00
How to use photo transfer gel
4 135 просмотров · 4 года назад
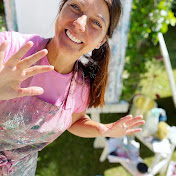
Art by Anna Karolina
1,73 тыс. подписчиков
4 135 просмотров · 4 года назад
Hej! Idag har jag färdigställt denna tavla med hjälp av photo transfer gel. Glöm inte att det bara är själva tekniken som du måste följa instruktionerna på, då kan du bara måla efter din egen konstnärlighet och stil.
Vad du behöver:
Laserskrivare
Sax
– Något att måla på, till exempel canvas eller en målarplatta
Penslar
Målarfärg (jag använde ink och akrylfärger)
Svamp
Photo transfer gel
Här är alla steg:
1. Använd en eller flera färger och gör en bakgrund med det. Jag använde ink och penslade därför på plattan med vatten.
2. Skriv ut något du skulle vilja ha i din tavla, till exempel en blomma, ett djur, vad du vill. Klipp sedan ut bilden.
3. Täck hela bilden med photo transfer gel med hjälp av en pensel, gärna med ett annat papper som underlägg.
4. Placera den täckta bilden där du vill ha den på tavlan. Se till att du inte har några luftbubblor, du kan eliminera luften genom att använda till exempel en gummispatel.
5. Låt torka i minst 24 timmar.
6. Blöt ner en svamp och gnugga bort pappret.
7. När allt papper är borta kan du göra din egen grej och låta kreativiteten göra sitt.
Fler material jag använde i denna målning:
Hårtork
Gummispatel
Posca penna
Vattenpensel
3D liner
Sprayfärg
Schablon
Välkommen till karamellbutiken: https://www.annakarolina.se
Solsken Karolina
Hello! Today I completed this painting that contains photo transfer gel. Don't forget that it's only the teqnigue that you have to follow the instructions, then you can just paint after your own artistry and style.
What you need:
Laser printer
Scissor
Something to paint on, for instance canvas or a paint plate
Paintbrushes
Paint (I used acrylic ink and acrylic colors)
Sponge
Photo transfer gel
Here's all the steps:
1. Use one or more colors and do a background with that. I used ink and therefore I brushed the plate with water.
2. Print something you would like to have in your painting, for instance a flower, an animal, whatever you want. Then cut out the image.
3. Cover the whole image with photo transfer gel by using a brush, preferably with another paper under.
4. Put the covered image where you want it on the painting. Make sure that you don't have any air bubbles, you can eliminate the air by using for instance a rubber spatula.
5. Let it dry for at least 24 hours.
6. Wet a sponge down and rub the paper off.
7. When all the paper is off you can do your own thing and let the creativity do its thing.
More materials I used in this painting:
Hairdryer
Rubber spatula
Posca pencil
Water pencil
3D liner
Spray paint
template
Welcome to my webshop: https://www.annakarolina.se
Sunshine Karolina
#paint #creative #art #ink #acrylic #painting #acrylicink #tusch #art #artwork #progress #studio #colors #inspiration #creativity #summer #flowers #green #pink #yellow #orange #colorful #details #3D #tree #magic #sponge #borås #skapargrlädje #blue #purple #phototransfergel #flower
00:00 Background
00:52 Application of photo
02:19 After 24 hours
3:34 How I comlpeted the painting
